

In this post we will cover the entire topic that is driving a lot of uncertain among robot builders, to know if they are actually assembling their robots in the right way, but first what is the definition calibration?
As Wikipedia says: "Calibration is the comparison of measurement values delivered by a device under test with those of a calibration standard of known accuracy. Such a standard could be another measurement device of known accuracy, a device generating the quantity to be measured such as a voltage, sound tone, or a physical artifact"
In our case will be "the calibration of the 4 servo motors"
If you understand the definition you will find out that you do NOT need to calibrate your Otto to be able to work properly, because a calibration is ONLY required for precise movements like let's say "straight walk" or standing in one leg without falling. (so is pretty much optional)
Why my Otto legs and feet are twisted?
It is a very frequent question in our Otto Builder community, Many Otto builders think they need to calibrate their robot because after the robot is assembled they see Otto with legs and/or feet in the wrong position or walking strange. But the truth is that, they might skip the important warning of having the motors properly centered as shown in the instruction manual or assembly video.
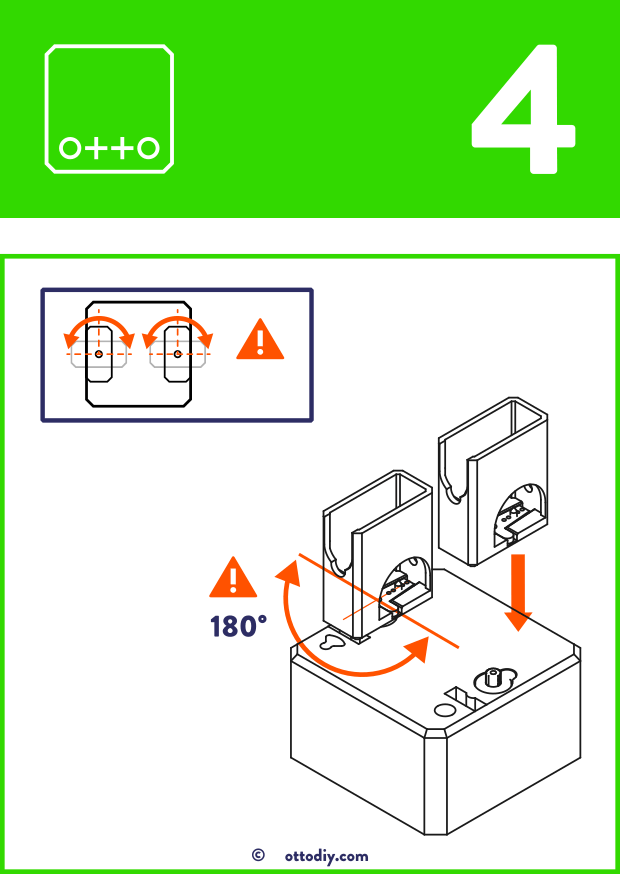
Otto uses 180 degrees servo motors that means the rotation is mechanically limited (we don't want the legs of Otto spinning like freewheels), if you see above picture, you have to make sure the servo motor is properly centered; in the middle of the 180 degrees rotation which is 90 degrees, you don't have to be that precise at this point, a tolerance of 6 degrees is fine (87-93 degrees works ok), but is absolutely necessary to put the white key with the screw only when you aresure the servo is centered (align close to 90 degrees).
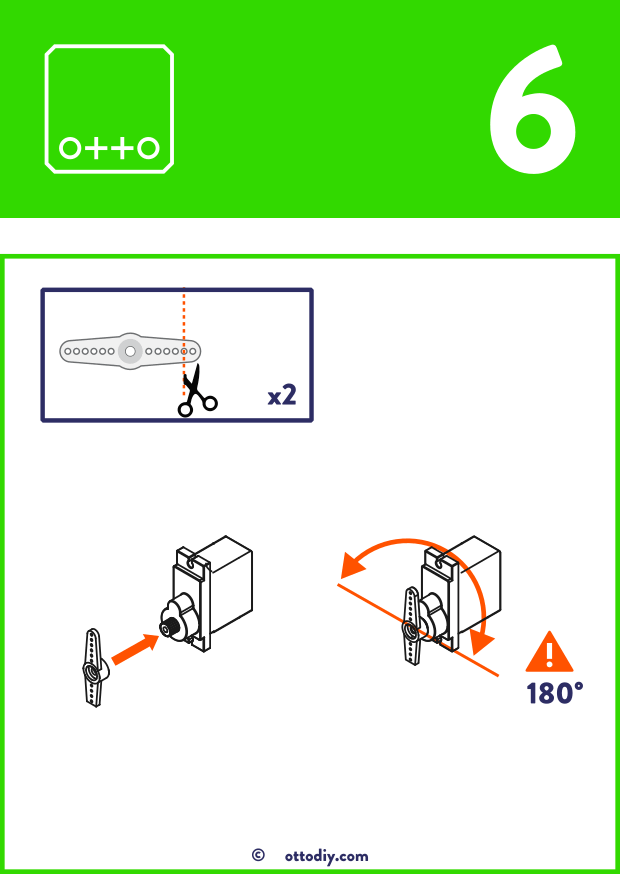
The same principle applies to the legs and to Otto PLUS metal gear motors.
Give a try! and now probably you discover that Otto is walking and dancing pretty good, and the rest of this post is not important to read at all!
You are right! In fact, i have only calibrated Otto once because with the proper assembly, a calibration is not required. But robots are precision machines and sometimes the servos will go crazy with random movements due to long use, that means we will have to electronically calibrate the servos to "zero" the position.
Here in this video we go a bit further of how can you make sure your servo motors are calibrated:
Since we have many ways to program Otto you will find out that is the same for calibration there are many ways some more difficult than others:
- Otto Blockly
- Arduino code manually (adjusting and iterating the TRIM values)
- Arduino code serial monitor (assistance to iterate values and save in EEPROM memory)
In this post we will focus on the Otto Blockly way since is easier for most beginner builders:
Otto calibration with Blockly
Blockly is aprogramming language JavaScript for creating block-based visual programming languages and editors. It is a project of Google and is free and open-source software
We have created our own software based on blockly that allows to generate Arduino code to compile and upload to Otto.
Before start make sure you have the servos connected in the right place. 2, 3, 4, 5 ports, connect your Otto and also check that board is on Arduino nano and your robot is selected in the USB port.
Step 1: Go to Examples
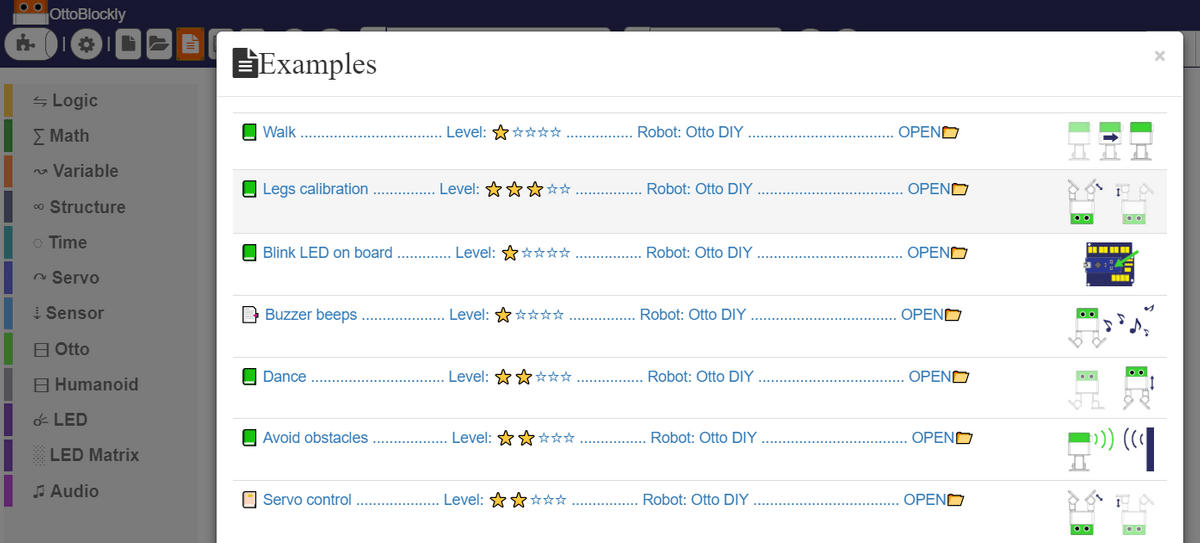
Step 2: Open Legs Calibration for Otto DIY
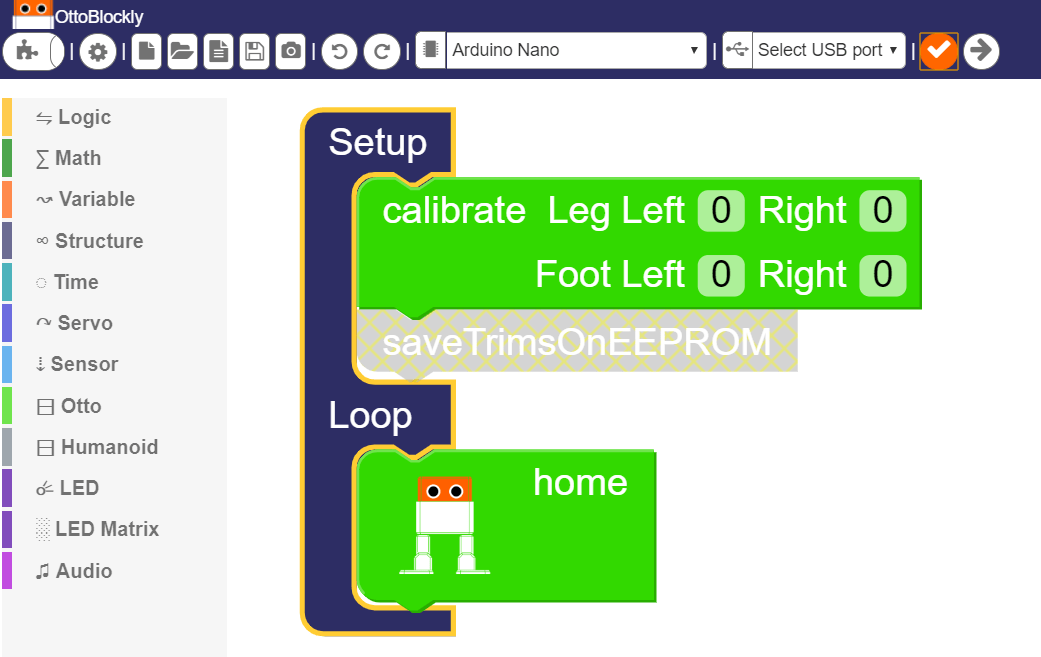
Step 3: Check the code (Compile)
Step 4: Upload the code
You will see that your Otto will move to and stand position, analize the current position of the legs and feet, which ones are in the wrong position?
Step 5: Iterate the values for each servo (leg or foot)
According to your robot you have to constantly change with small increment or decrements values (-20 to 20) of the legs or feet that were in the wrong position and repeat step 3 to 5, until you are happy with your almost perfect position.
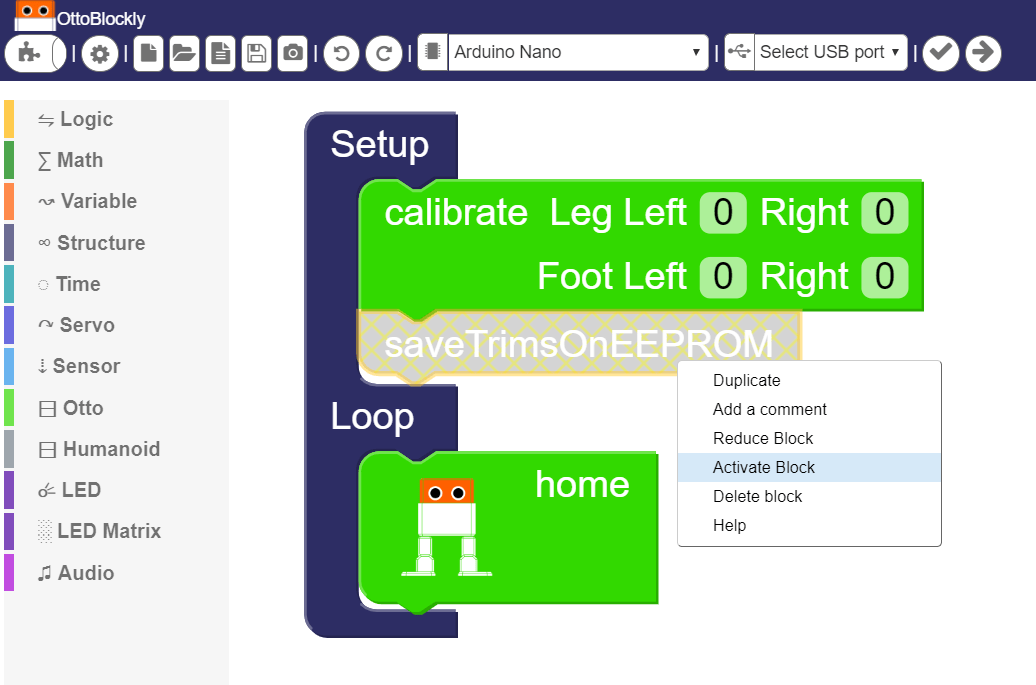
Step 6. Activate saveTRIMSOnEEPROM Block
Right click on the block and you will see this small menu, select "Activate Block"
Step 7: Check and Upload to board for the last time
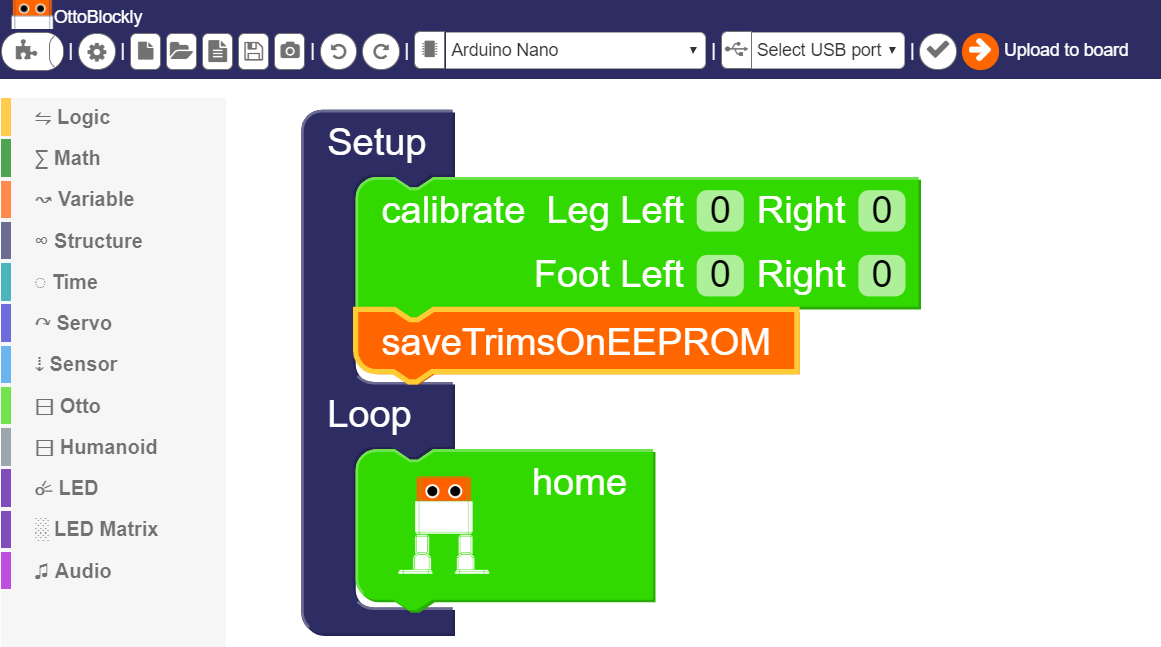
After Upload program successfully, You Otto is fully calibrated!, even in the EEPROM memory, so you don't need to do this again for this particular robot you connected, for future programming, but be careful to only do this one time or the EEPROM memory could be permanently damaged, as an alternative you can just use the calibrate block in every future code with the values you have establish and don't saveTRIMSOnEEPROM like this you have the flexibility to decide.

The Arduino method is quite similar but you are in an C++ enviroment and is a little bit tricky to find the TRIMS values to modify but if you are advanced here give a try to the codes here
Have you calibrated your own robot? Do you think is relevant?
New article here: 5 ways to calibrate biped robots like Otto
