

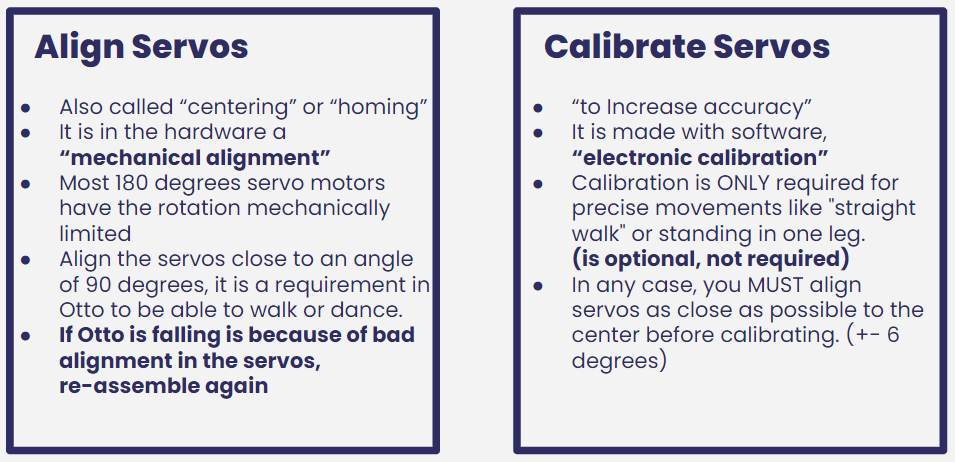
In a previous post we addressed how to calibrate Otto to walk straight but there are other alternatives. If you are new to Otto we still recommend you to read that article but most important to understand the difference between alignment and calibration of the servo motors.
1. Otto servo Calibration App
New users have now an easy interface to work with. One that is not as scary as the serial monitor. We have a video that shows the process:
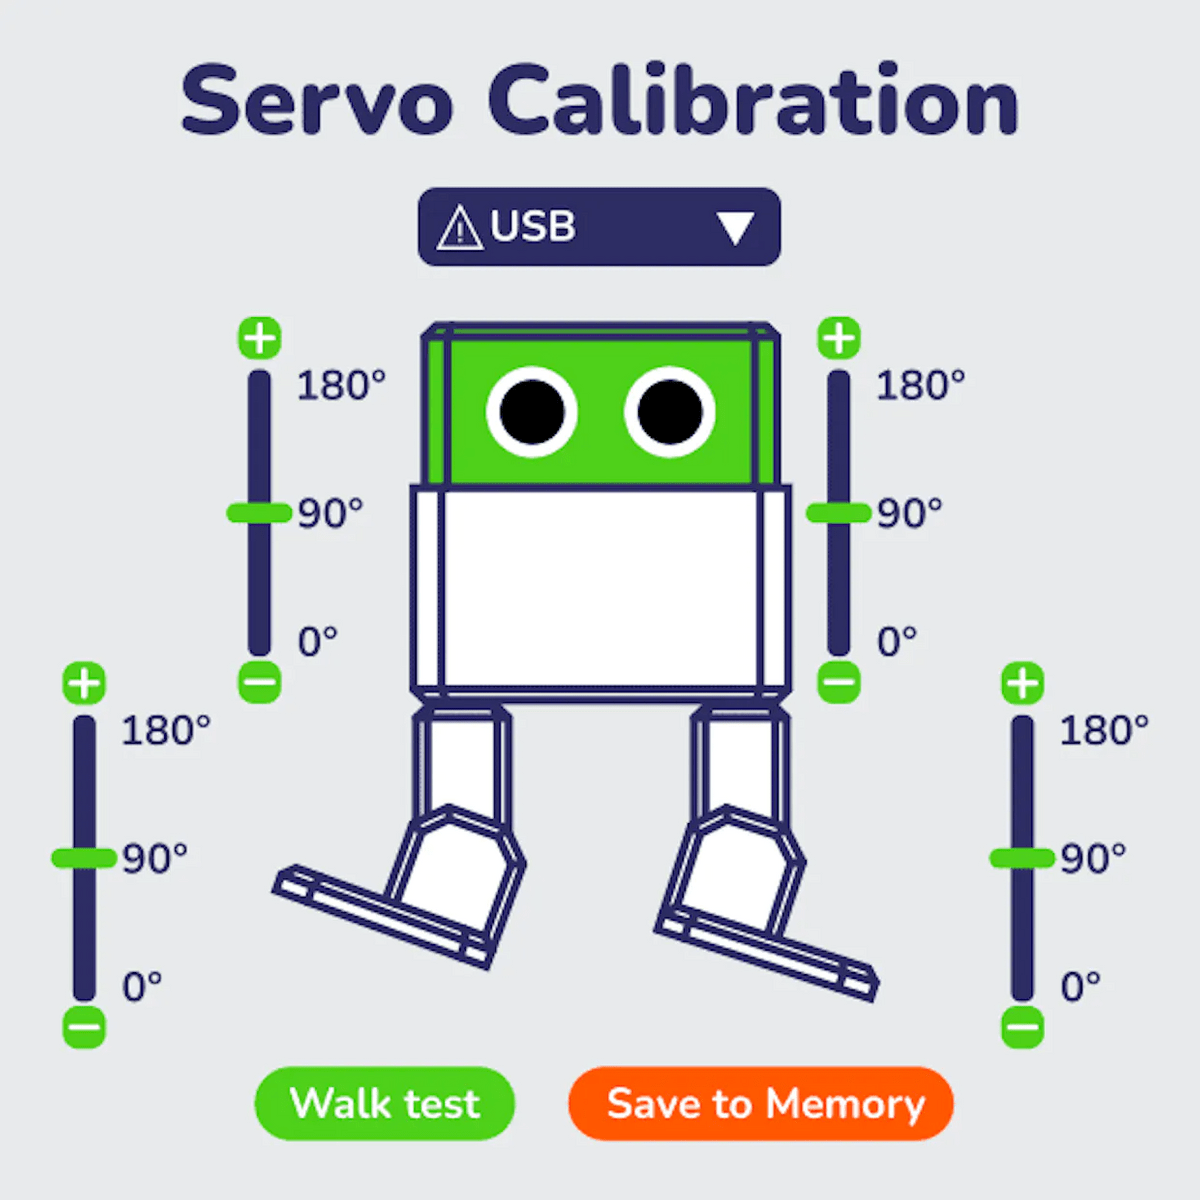
UI design for the calibration app
You might be thinking; oh thats all! why to bother with other ways? well you might have some difficultties depending on your OS so continue reading. :D
2. Using desktop App
Try this desktop App it will ask you to install .NET Framework 3.5
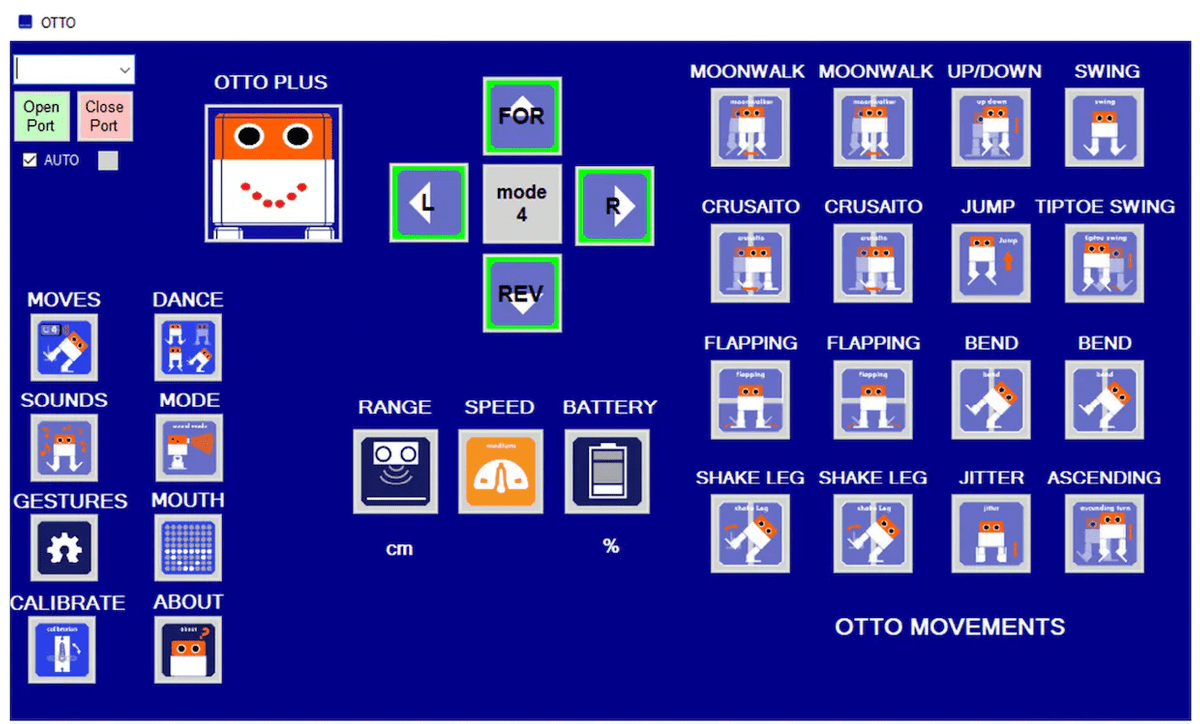
It is like the mobile App but on your PC using USB to send all commands
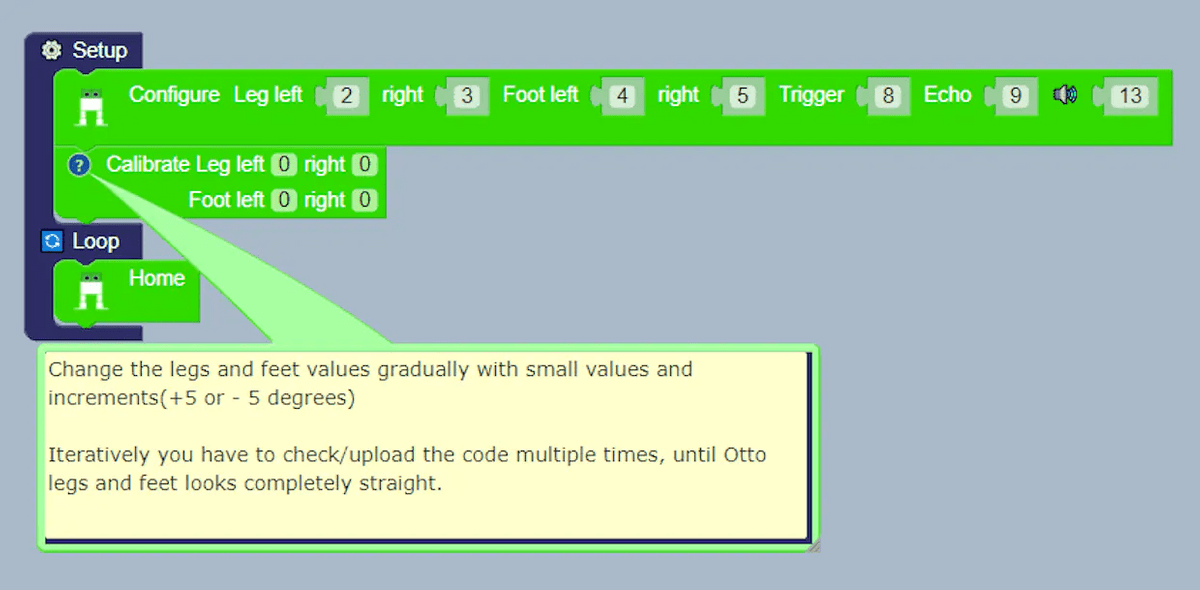
3. Using Otto Blockly calibration blocks
The most simple way so far but annoyingly need to reupload the code until by iteration you achieve the right alignment of the motors.
It is a default example in Otto Blockly ready to open.
Change the legs and feet values gradually with small values and increments(+5 or - 5 degrees)
Read this article for more details: https://www.ottodiy.com/blog/calibration
4. Using Otto Blockly with serial monitor
I just made this "basic" example of how to quickly calibrate Otto servo motors, we have seen very good methods here with Arduino IDE, but this one aims to make it simple for beginners.
Just open/upload then start serial monitor and follow the instructions.
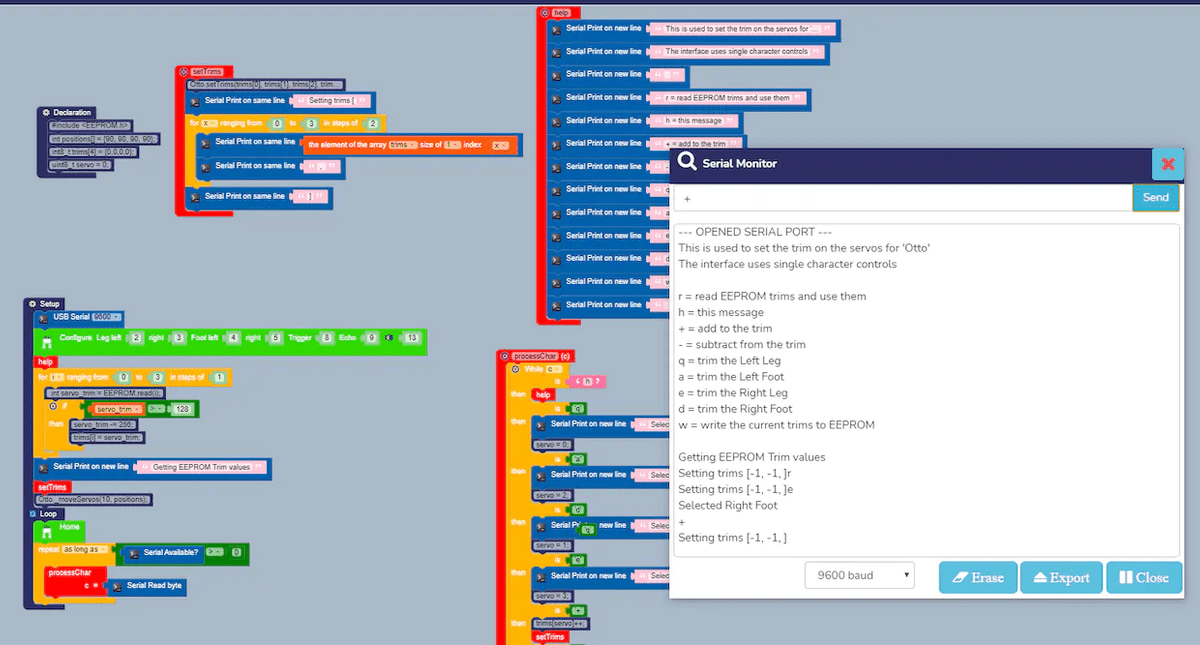
Calibrate Otto with serial monitor in Otto Blockly
It is very handy because is fast and easy to leave your Otto perfectly calibrated in one upload.
But It needs improvement and actually, I found out that Otto Blockly is missing blocks but they can be replaced with direct code
missing on variables int8_t and uint8_t
need Otto._moveServos(10, array variable); block
5. Using Arduino Serial
Arduino IDE has been the deafult way to do it, becuase all the source code is written there, it is very similar to the previous option but just from the Arduino software. Download this sketch code OttoDIYLib/examples/calibration, upload the code, then open serial monitor and follow instructions. It is quite daunting process for many, but with a proper tutorial is not that hard.
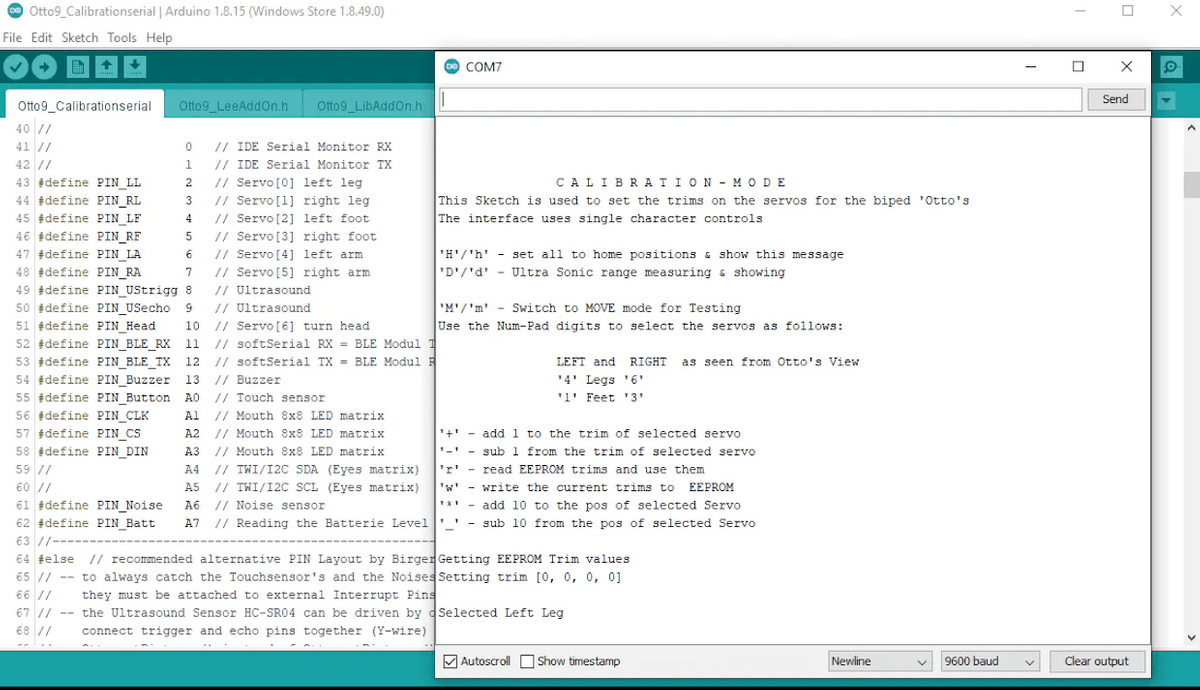
serial monitor does all the work for you.
Which way do you think is the best to calibrate robots with servo motors? Do you know any other ways?
Please let us know down in the comments.